Comments 2015
| Go Back to the Facebook Help Index |
||
|
Facebook Timeline Guide
|
||
|
Updated March 2015
• Next, make sure you do not have any public status updates for strangers to see. This is very easily done with the "Limit the Audience for Past Posts" option found on the Privacy Settings page. This lets you change all of the status updates (that are currently set to public) to "friends only" - yet it will not have any affect on updates that are already limited some other way.   • If you dont want your profile to be found when people search for you, read this to understand all the search settings: http://abrax.us/Facebook/NotSearchable.php • Adding people to the "Close Friends" list will notify you every time they create a status update, so in short, add the people you want to stalk the most to that list (they are not notified about it, nor will they be able to see that you added them to that list) • Adding people to the "Acquaintances" list will prevent people you want to remain friends with from showing up too much in your news feed. This is useful for controlling the attention whores who post a new status every 5 minutes telling you things you get annoyed by reading. • Adding people to the "Restricted List" will prevent them from being able to see any of your activity in their ticker, and it also prevent them from seeing anything you post as a status. (so basically, add anyone to that list who you do not want to be able to stalk you) • Go thru your "About" (like Work/School/etc...) and look for the audience selectors there to control who can see various parts of your profile. To find that section, open your timeline and click on "Update Info" • Then click on "About"  • go thru each of these pages and set up your privacy settings - they are different on each page  • "Contact and Basic Info" and "Family and Relationships" links are the most important ones. They store your most personal information. If you want to change something, you need to find the EDIT link for the item you want to change. This is done by hovering your mouse over the item you want to change. When you do that, an Edit link will appear on the right. You will not see the edit link until you hover your mouse over it.  • Next, if you have had your account for a long time, go thru your "Likes" here's how to do that... Edit your LIKES • Once you are done with that, you might want to go thru all of your pictures, and create a date that the picture was taken (and the location) then the timeline will show the pictures in order, mixed in with your events and statuses.  • You can set your friends to be private if you want to. • You can make your wall private if you want to. • You can make your photos private if you want to. • You can quickly remove some of your friends if you want to. • I have also created this help index to help people understand visually how to use Facebook to its fullest. • If you then want to verify that your privacy is set up the way you want it, go back to your timeline and select the "View As" option here. 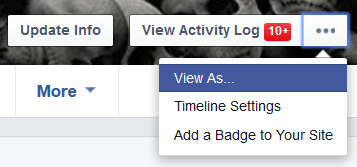 Then you can type a person's name in the provided box to see what that person sees when they look at your timeline, OR, if you want to see what the public sees when they view your timeline.  |
|
|